Creating Your First Flutter App
The fastest-growing skill among software engineers and the third most popular open-source project—that’s how fast the Flutter train is moving; as reported by LinkedIn and GitHub.
This article welcomes you aboard by building Hot Tip, the hottest tip calculator app. Along the way, you’ll learn how to:
- Create an app that runs both on Android and iOS;
- Use material design components developed by the Flutter Team;
- Create custom interactive UI components;
- Be more productive by reloading your app without the need to build and run on every code change;
Prerequisites: If you have basic OOP knowledge, you’ll get along just fine. If that’s not your case, I suggest you read this article first.
Set Up
Follow the instructions to install Flutter on your machine (if you haven’t already). You can also find some great YouTube videos to help you with that.
When choosing an editor, be aware that we’re using Android Studio for the rest of the article. Visual Studio Code will also work, but you’ll need to adapt some instructions.
Download the starter project by clicking here or by checking out the introduction/starter branch from the Hot Tip repository.
Unzip the file (if you didn’t choose to clone the repository) and open Android Studio 4.0 or later. Click on Open an existing Android Studio project and choose the folder containing the pubspec.yaml from you unzipped download.
Double-click pubspec.yaml on the left-side panel (1) and then click Pub get at the top of your screen.

The starter project already contains some files you’ll use, but you still won’t be able to run it for now!
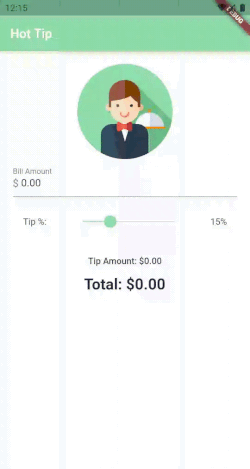
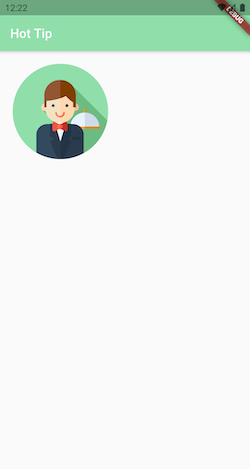
Throughout the tutorial, you’ll not only make it run but turn it into this:
Demystifying Widgets
There’s a mantra in Flutter development:
Everything is a widget.
Widgets are the building blocks of Flutter apps.
Think of them as LEGO bricks you keep combining into larger and larger pieces until they end up forming an enormous castle—your app, in this analogy.
You won’t start from scratch. Flutter comes with powerful libraries—your LEGO sets—full of basic widgets for you to use.
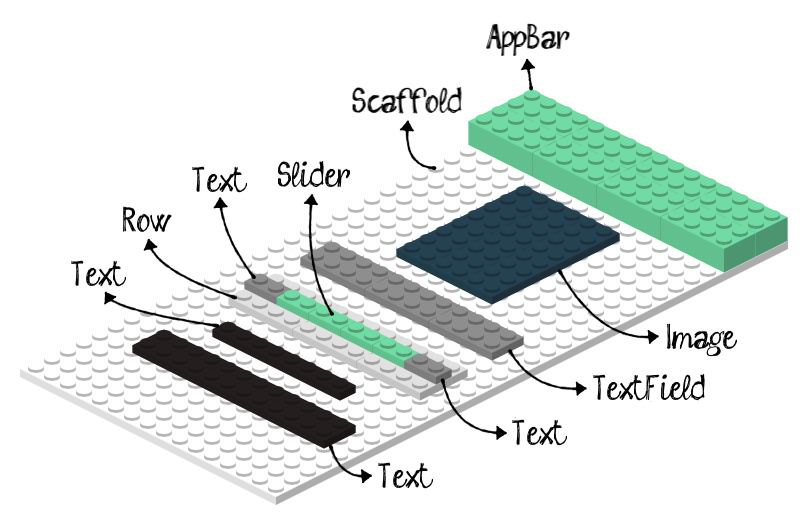
Notice that widgets aren’t limited to visual elements like Image or Text. Row, for example, is a widget that takes in a list of other widgets and layouts them side by side.
Note: This page catalogs the widgets that come with Flutter.
Creating Your First Widget
Open lib/main.dart and add an import to the material library:
import 'package:flutter/material.dart';That gives you a ton of widgets to start.
Your first custom one is the _HomePage.
Add the following code below the import statement:
Going over it step-by-step:
- When creating a widget, you either extend from
StatelessWidgetorStatefulWidget; more on that later. - Overriding
build()is how you tell Flutter what other widgets you used to compose yours. - To help you position a bar at the top and the calculator in the remaining space, you’re using
Scaffold, a skeleton for typical material design pages. It provides you slots for things like an app bar, a floating action button or a bottom navigation menu. - Using a
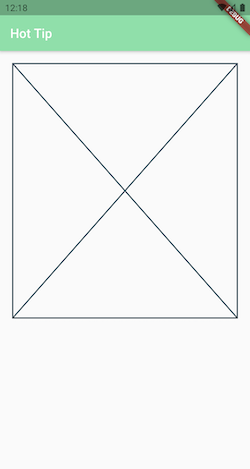
SingleChildScrollViewmakes the content scrollable. That’s great when it may not fit on smaller screens. The padding property is putting some space between the screen border and the content. - Fills the area with a big X while you don’t have the calculator.
Creating the App Widget
Before running your code, you need to create a widget representing your app. Remember the mantra:
Everything is a widget.
Still on lib/main.dart, between the import statement and the _HomePage, insert this:
Here’s what’s new for you with the code:
MaterialAppwraps some widgets required for an app to run. It’s also useful for app-wide configuration, e.g., what you’re doing with thetheme.- Some widget’s properties default to the theme’s primary color, e.g., the
AppBar’s background.
Now, you need to tell Dart what to execute when running your project. Add the following function above the _HotTipApp in the same lib/main.dart file:
void main() => runApp(_HotTipApp());runApp() is a function provided by Flutter to inflate your widget and attach it to the screen.
Connect your hardware device or start an emulator, then build and run your app by pressing Control-R on macOS or Shift-F10 on Linux or Windows. You should be looking at this:
Widget Types
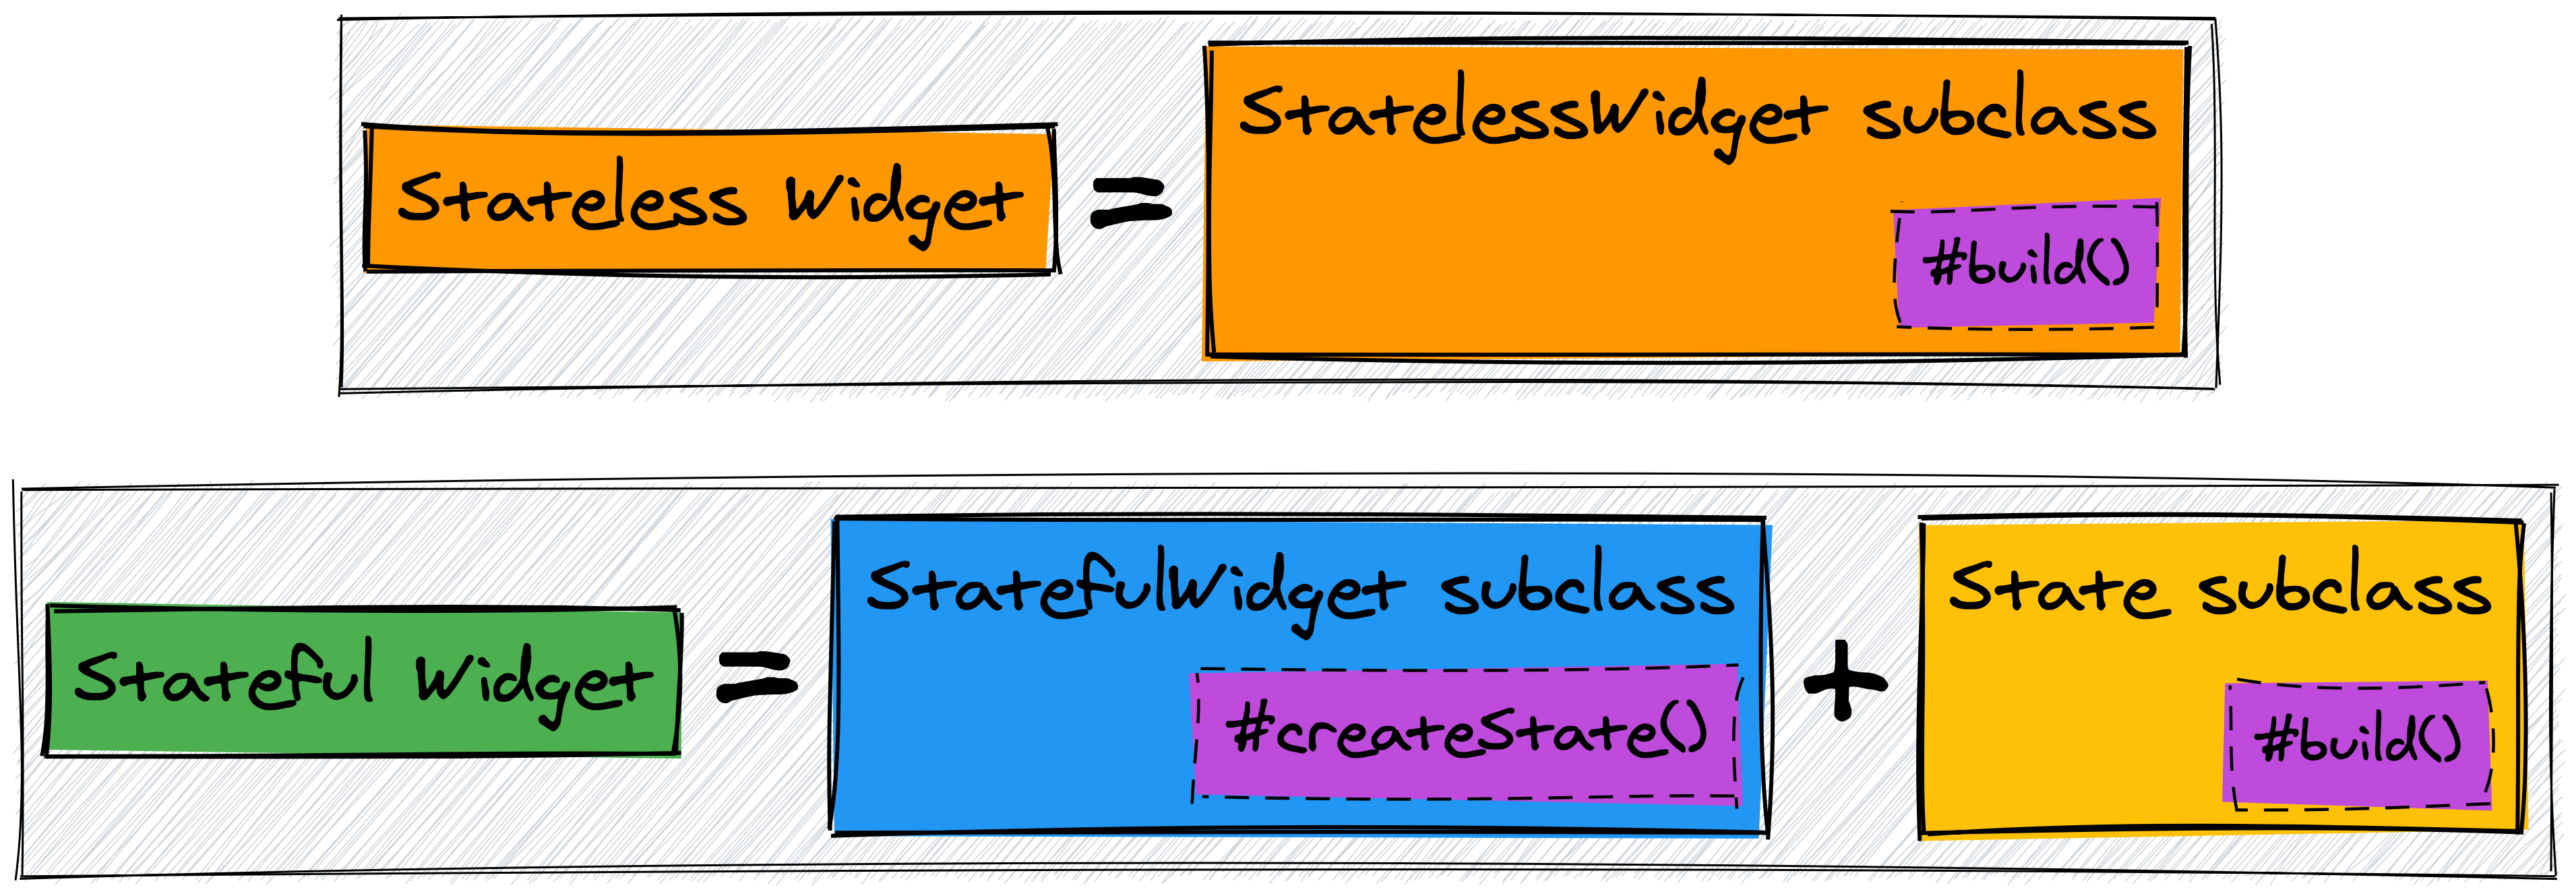
Widgets come in two flavors:
- Stateless widgets
These are static and don’t ever change their appearance.
For example, if you want to change the String displaying on a Text, you’ll need to replace the entire widget.
- Stateful widgets
These are dynamic and can change its appearance if, for example:
- The user interacts with it, e.g., a
TextField; - It receives data, e.g., an
Imagethat fetches a picture from the internet;
Under the Hood of Stateful Widgets
Both StatelessWidget and StatefulWidget subclasses are immutable. Their variables can’t change once the class instantiates.
As StatefulWidget’s can’t store mutable variables, they must create an object that can. That object should be an instance of a State subclass, and that makes it the owner of the build() now.
Note: When creating a widget, always start with stateless. Then, if you find yourself needing a mutable variable, make it stateful.
Creating a Stateful Widget
Time to get rid of that Placeholder!
Open lib/tip_calculator.dart, and add the code for the TipCalculator and its State:
That’s how a stateful widget looks! Diving into the code above:
- Overriding
createState()is how you tell Flutter what’s yourStateobject; _tipPercentageand_billAmountare the only mutable variables you need._tipAmountand_totalAmountare just computed properties.Columntakes in a list of other widgets and layouts them vertically.MoodyWaiterImagedisplays a different image depending on how fat thetipPercentageis.
Go back to lib/main.dart and, at the top, import the file you’ve defined the TipCalculator:
import 'package:hottip/tip_calculator.dart';Now, inside the _HomePage, replace Placeholder() with TipCalculator().
Hot Reload
If you haven’t stopped the app since you ran it, save lib/main.dart by pressing Command-S on macOS or Control-S on Linux or Windows.
Wait a couple of seconds, and you should see the changes reflect on your phone. This feature’s name is hot reload.
Note: If the hot reload fails, you can always build and run.
The Placeholder is gone, and you should be looking at a happy waiter instead:
Using Input Widgets
Your app is evolving but still doesn’t look like a calculator.
The starter project already contains some personalized input widgets:
BillTextFielduses flutter_masked_text to fit what the user types into a currency format;TipPercentageSlideradds a label and a value indicator to a regularSliderfrom the material library;
Import these two files at the top of lib/tip_calculator.dart:
import 'package:hottip/components/bill_text_field.dart';
import 'package:hottip/components/tip_percentage_slider.dart';
Continuing on lib/tip_calculator.dart, replace the // TODO: Add other children here., inside the Column, with:
Here’s what’s going on:
- Input widgets typically have an
onChangedproperty. The function you provide there executes whenever the user changes the value of the input. Statesubclasses must change their variables inside a call tosetState(). That causes thebuild()to run again and reflect changes in the UI.- Using a
SizedBoxis a handy way of defining space between widgets.
Congratulations! Time to hot reload for the last time and enjoy the result of all the hard work you’ve done:
Next Steps
You can download the completed project files by clicking here or by checking out the introduction/final branch from the Hot Tip repository.
You’re officially aboard the Flutter train, and this is just your first stop! I suggest you access raywenderlich.com resources now and create your itinerary.
I’d love to hear your feedback or questions in the comment section below!